This is basically a Photoshop trick, but it keeps you from having to go back & forth from InDesign to Photoshop. Since we all know how to do most of the beginning, I'm going to skip to the hard part.
Step 1. Start with a background image in it's own layer; Lock it & make a text layer.

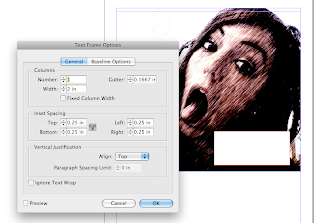
Step 2. Create a text frame & fill with white

Step 3. Create an inset in the text frame of at least .25
Step 4. Create text

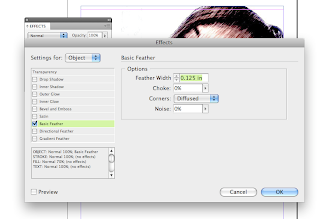
Step 5. Lower the opacity of the white in the Effects menu. Make sure to highlight Fill

Step 6. From the Effects menu, choose Basic Feather to soften the edges
Step 7. Just kidding...there is no Step 7, You're Finished :)

No comments:
Post a Comment
Note: Only a member of this blog may post a comment.